In preparation for PAX Prime 2015, I decided to create my own Thorn, an Exotic Hand Cannon from bungie’s “Destiny”. Now, 3D Printing is what I do best. I can crank things out for people all day long, tweaking, modifying, etc. However, painting and decorating? Not so much. Can I do it? Probably. Have I done it before? Nope… guess it’s time to learn on the job!
This was an experiment in making a full on prop end-to-end, and I have to say, I’m happy with the results! Looking back there is a lot I think I did wrong, and while it might not be highly visible on the surface, I know it and at least now I’m better prepared for the next time. Practice makes perfect and all that…
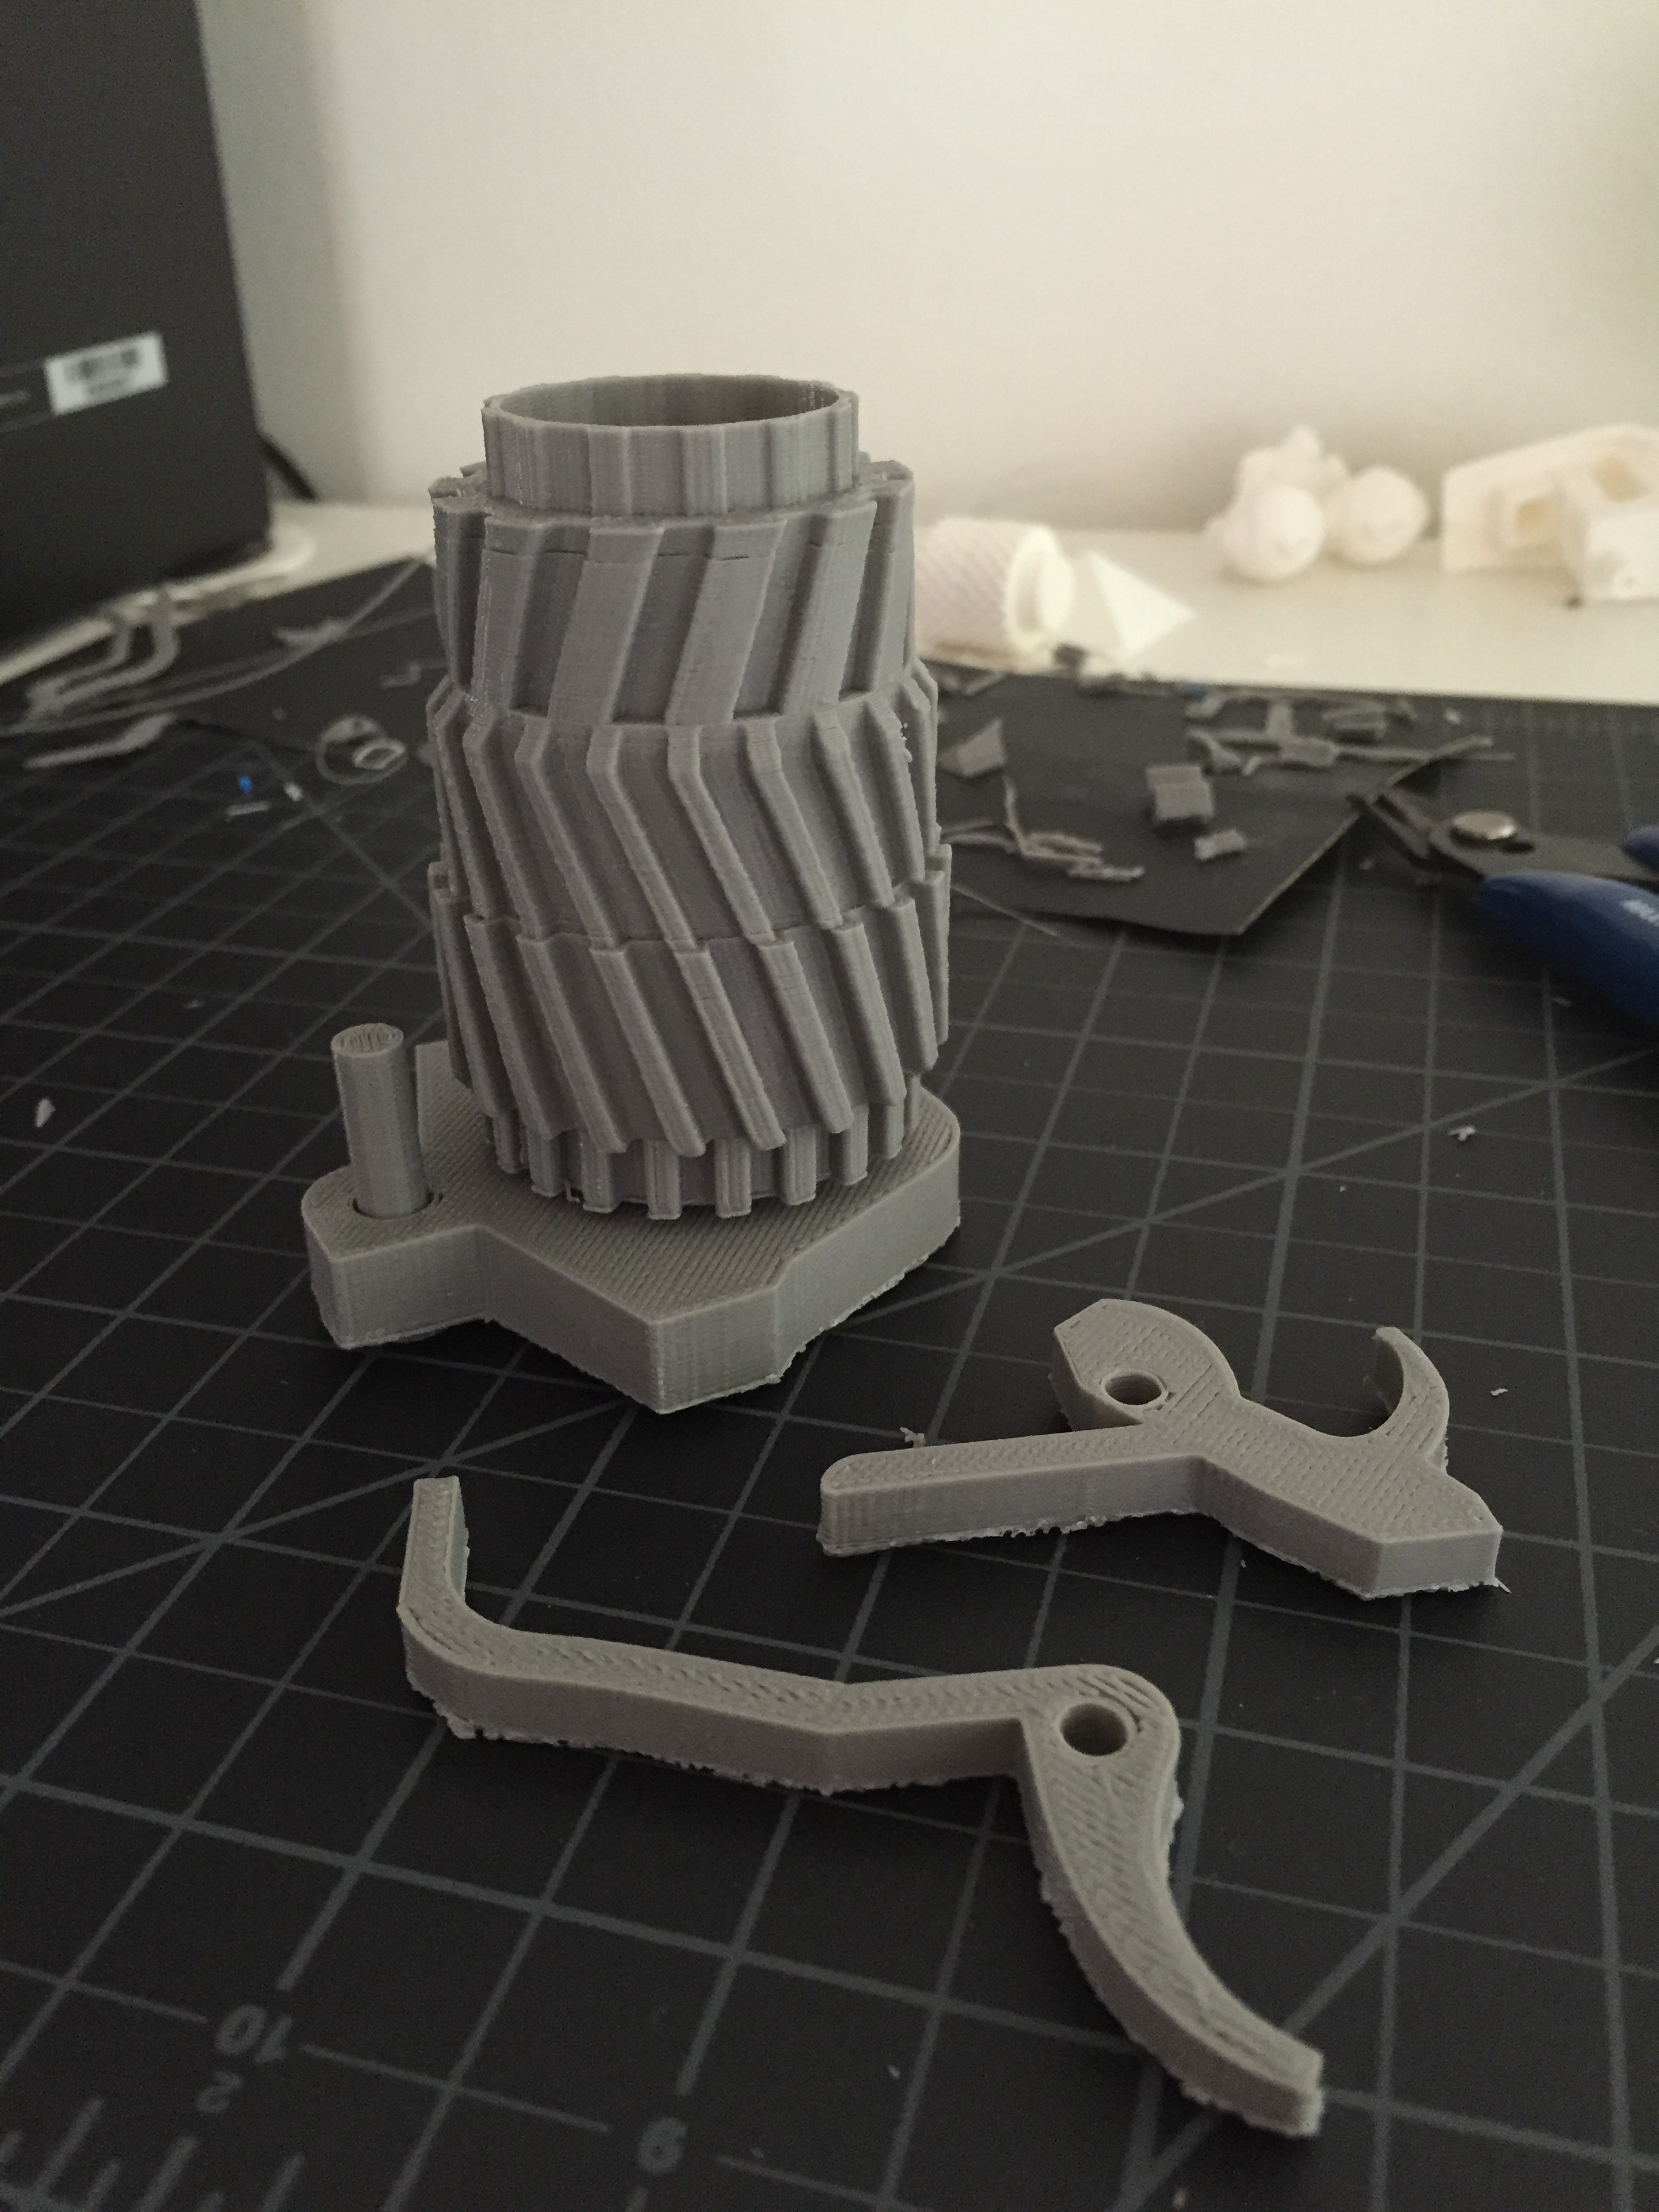 This was the Chamber and trigger assembly. It’s multi parted so that pulling the trigger will toggle the hammer. The chamber itself rests against a place on a pin that allows it to flip out as well, because let’s face it these are things you expect any revolver you hold in your hand to be able to do!
The parts came out a bit rough on the back side, but a hand file and sand paper easily resolved that issue. The large pin however, and especially the pin inside the chamber that holds it to the plate, were a tad flimsy. I had to tweak the pre-fabricated model I found online multiple times, and print 4 or 5 of them, before I got one structurally sound. Then I kicked out 2 more of each as a back up “just in case”.
 To the left, is the middle of the barrel. The right, was when I did a test-fitting of the left and right halves of the chamber housing around the chamber and the trigger assembly, with the grip holding it together. Things fit fairly well, though I noticed some warping on some of the edges I needed to work around/clean up.
I also at this point realized the pins that the trigger and hammer hinge against are fragile, as half of each one broke. Unfortunately, they are attached to each half of the body which is a 6 hour print each… so reprinting wasn’t practical. Instead I opted to replace them with some recycled metal pins from something else and just embed them into the plastic with epoxy.
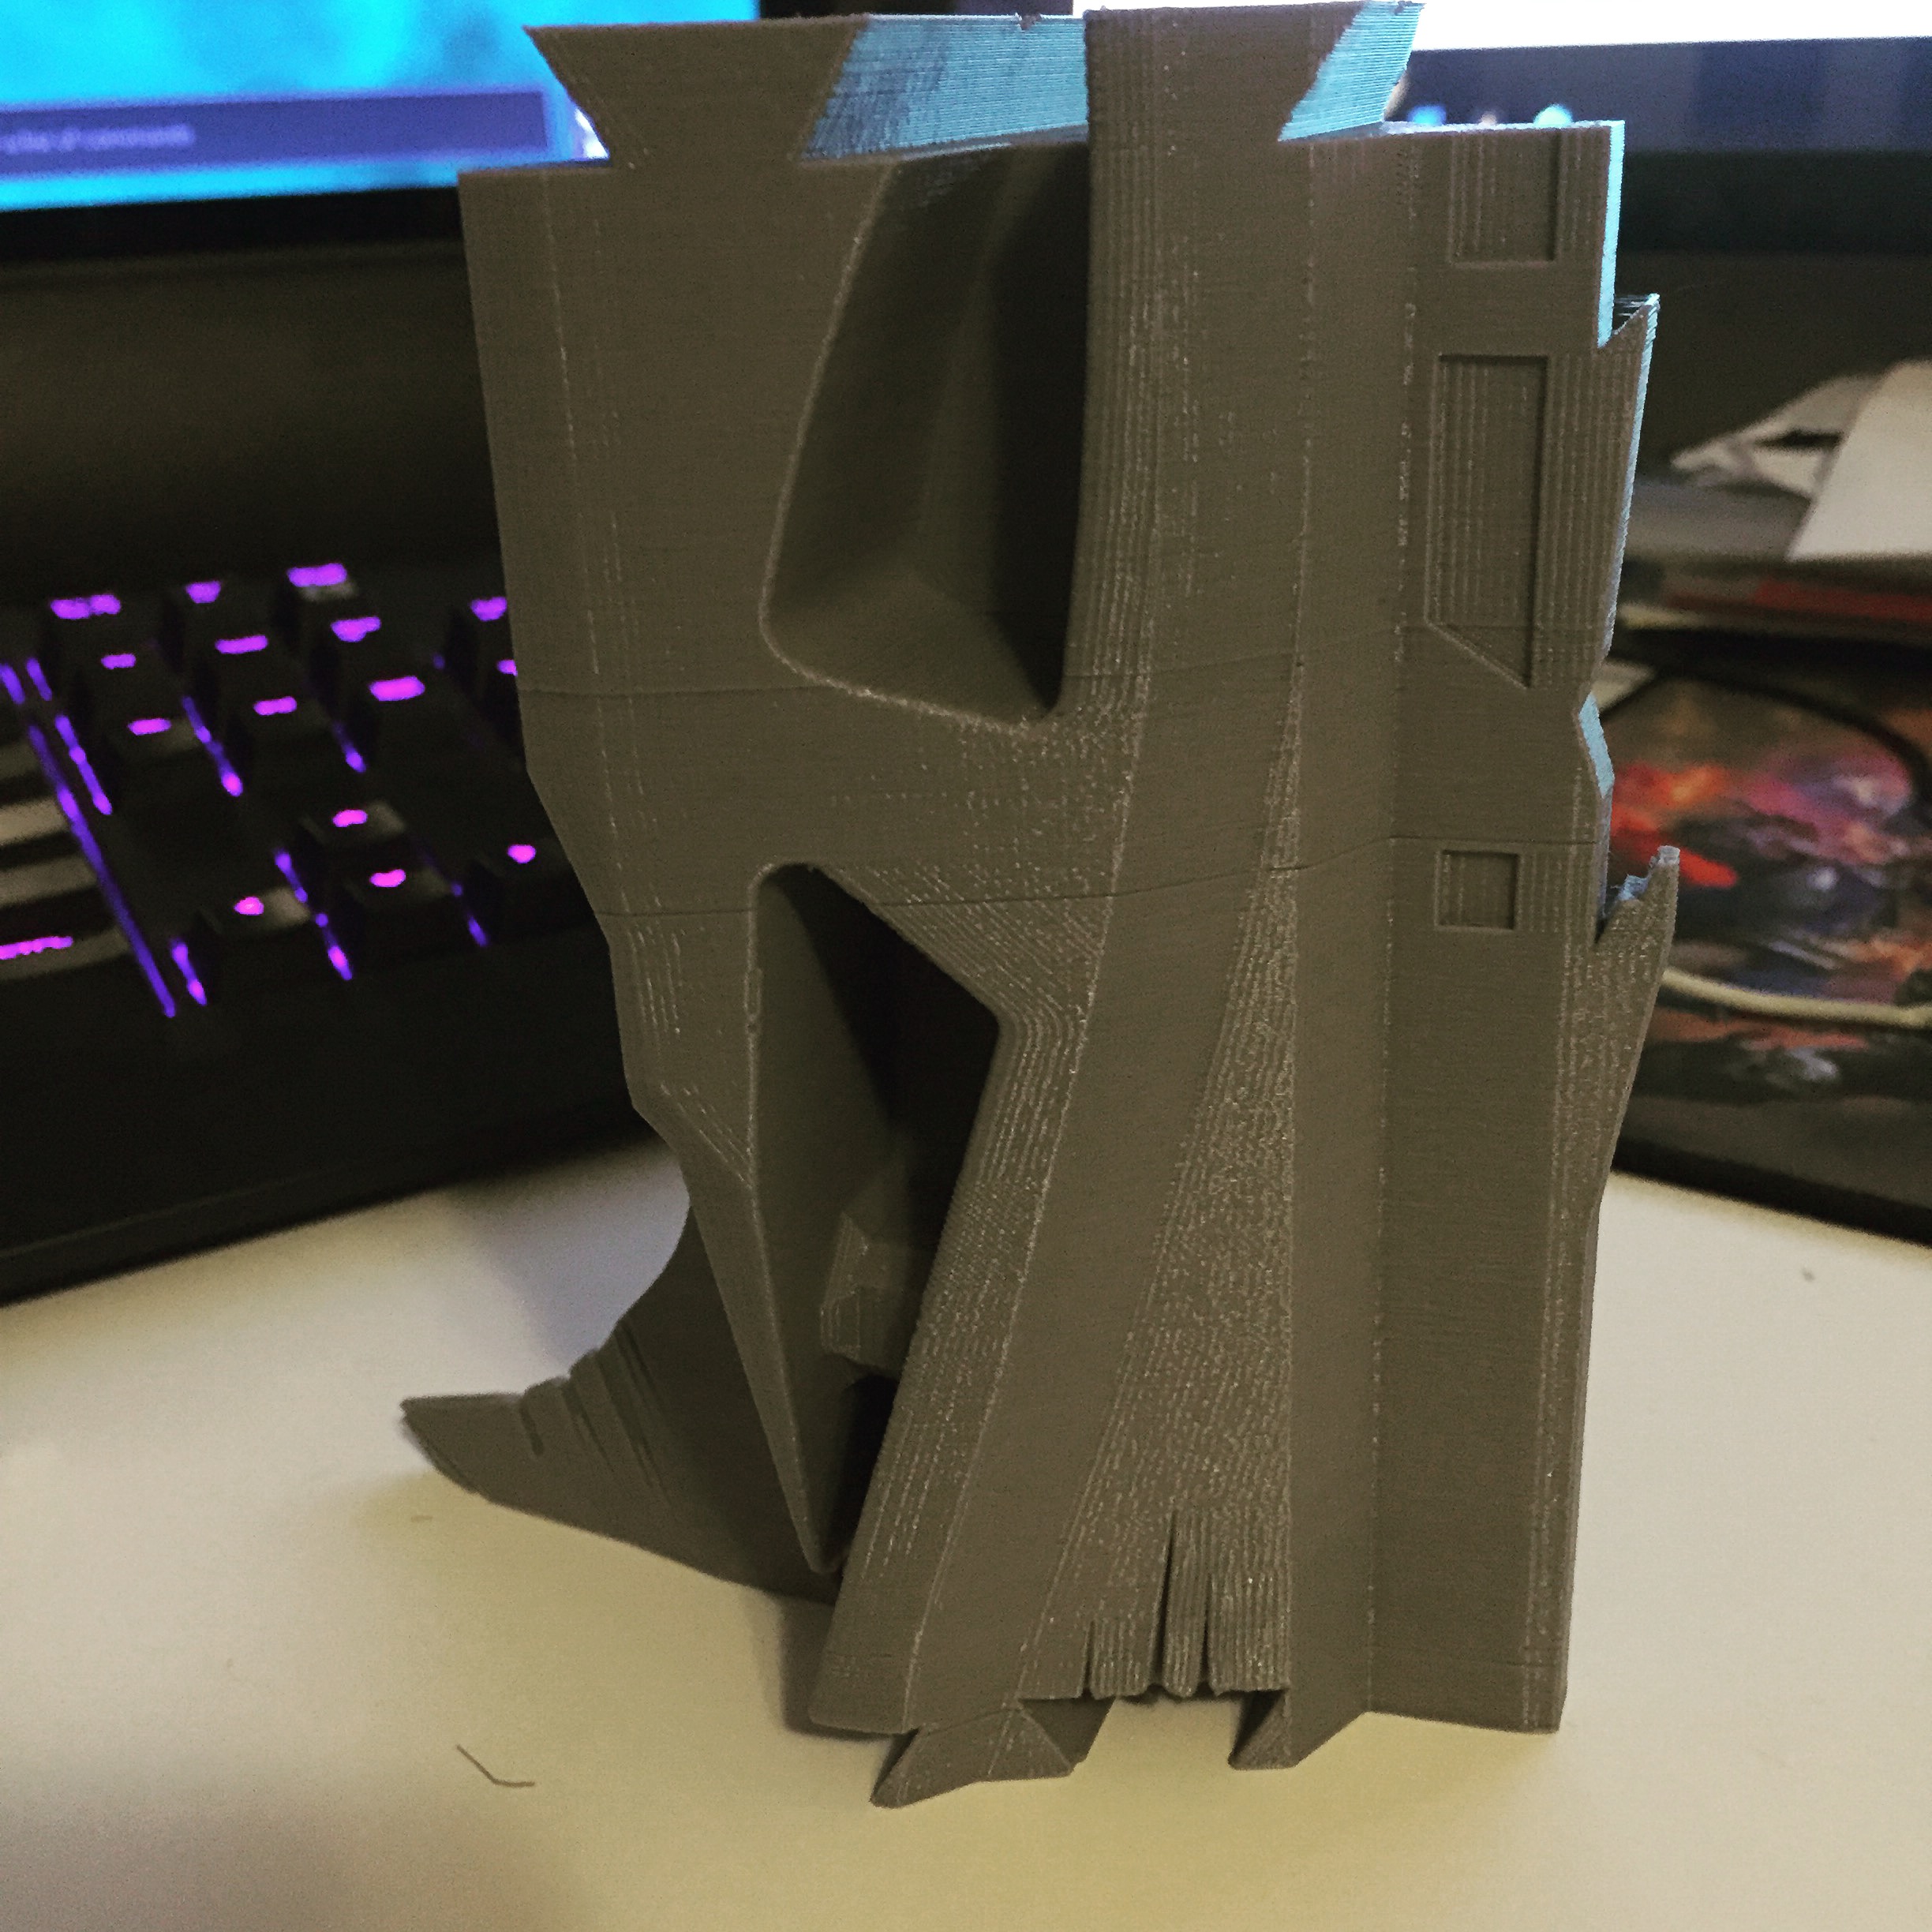
On the left, you’ll see some ugly lines in the middle, that’s where I paused the print for several hours before it finished. Oops. I didn’t think it would be nearly that obvious, but it was. On most of my smaller prints this has never happened before in any noticeable way, but I guess it has to do with the volume of what I was working with and the fact some very smooth/vertical surfaces were at play.
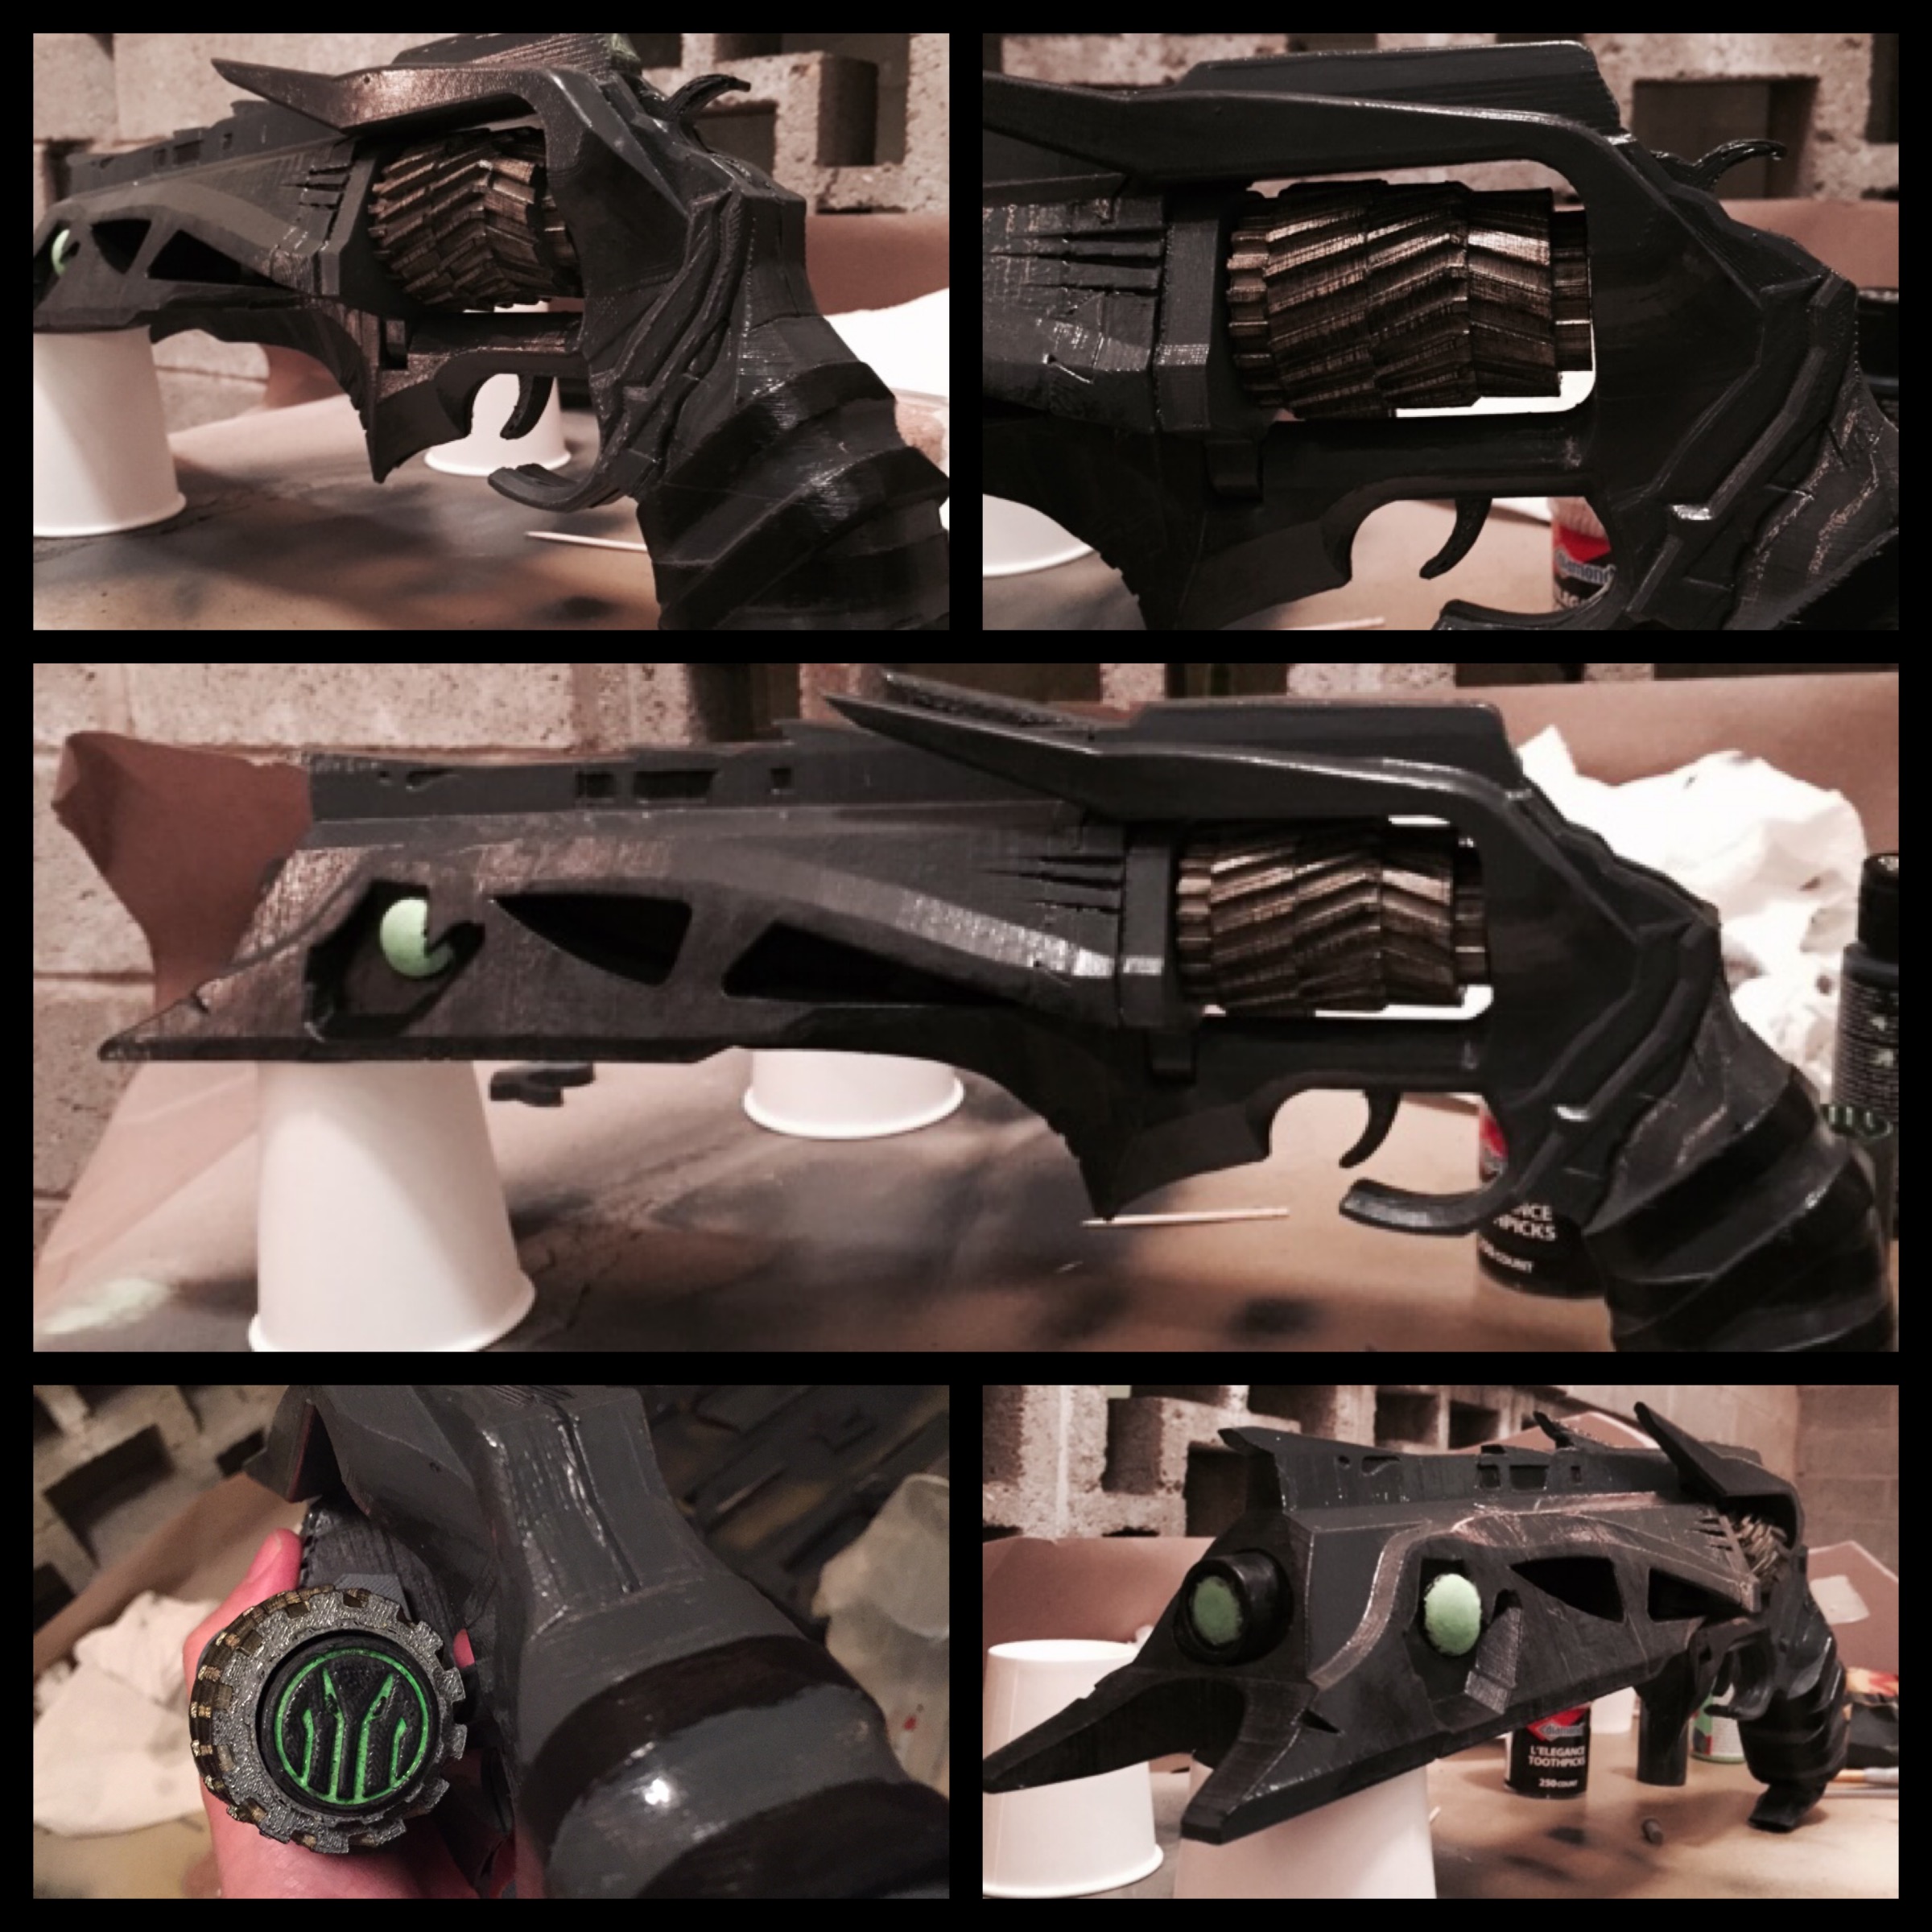
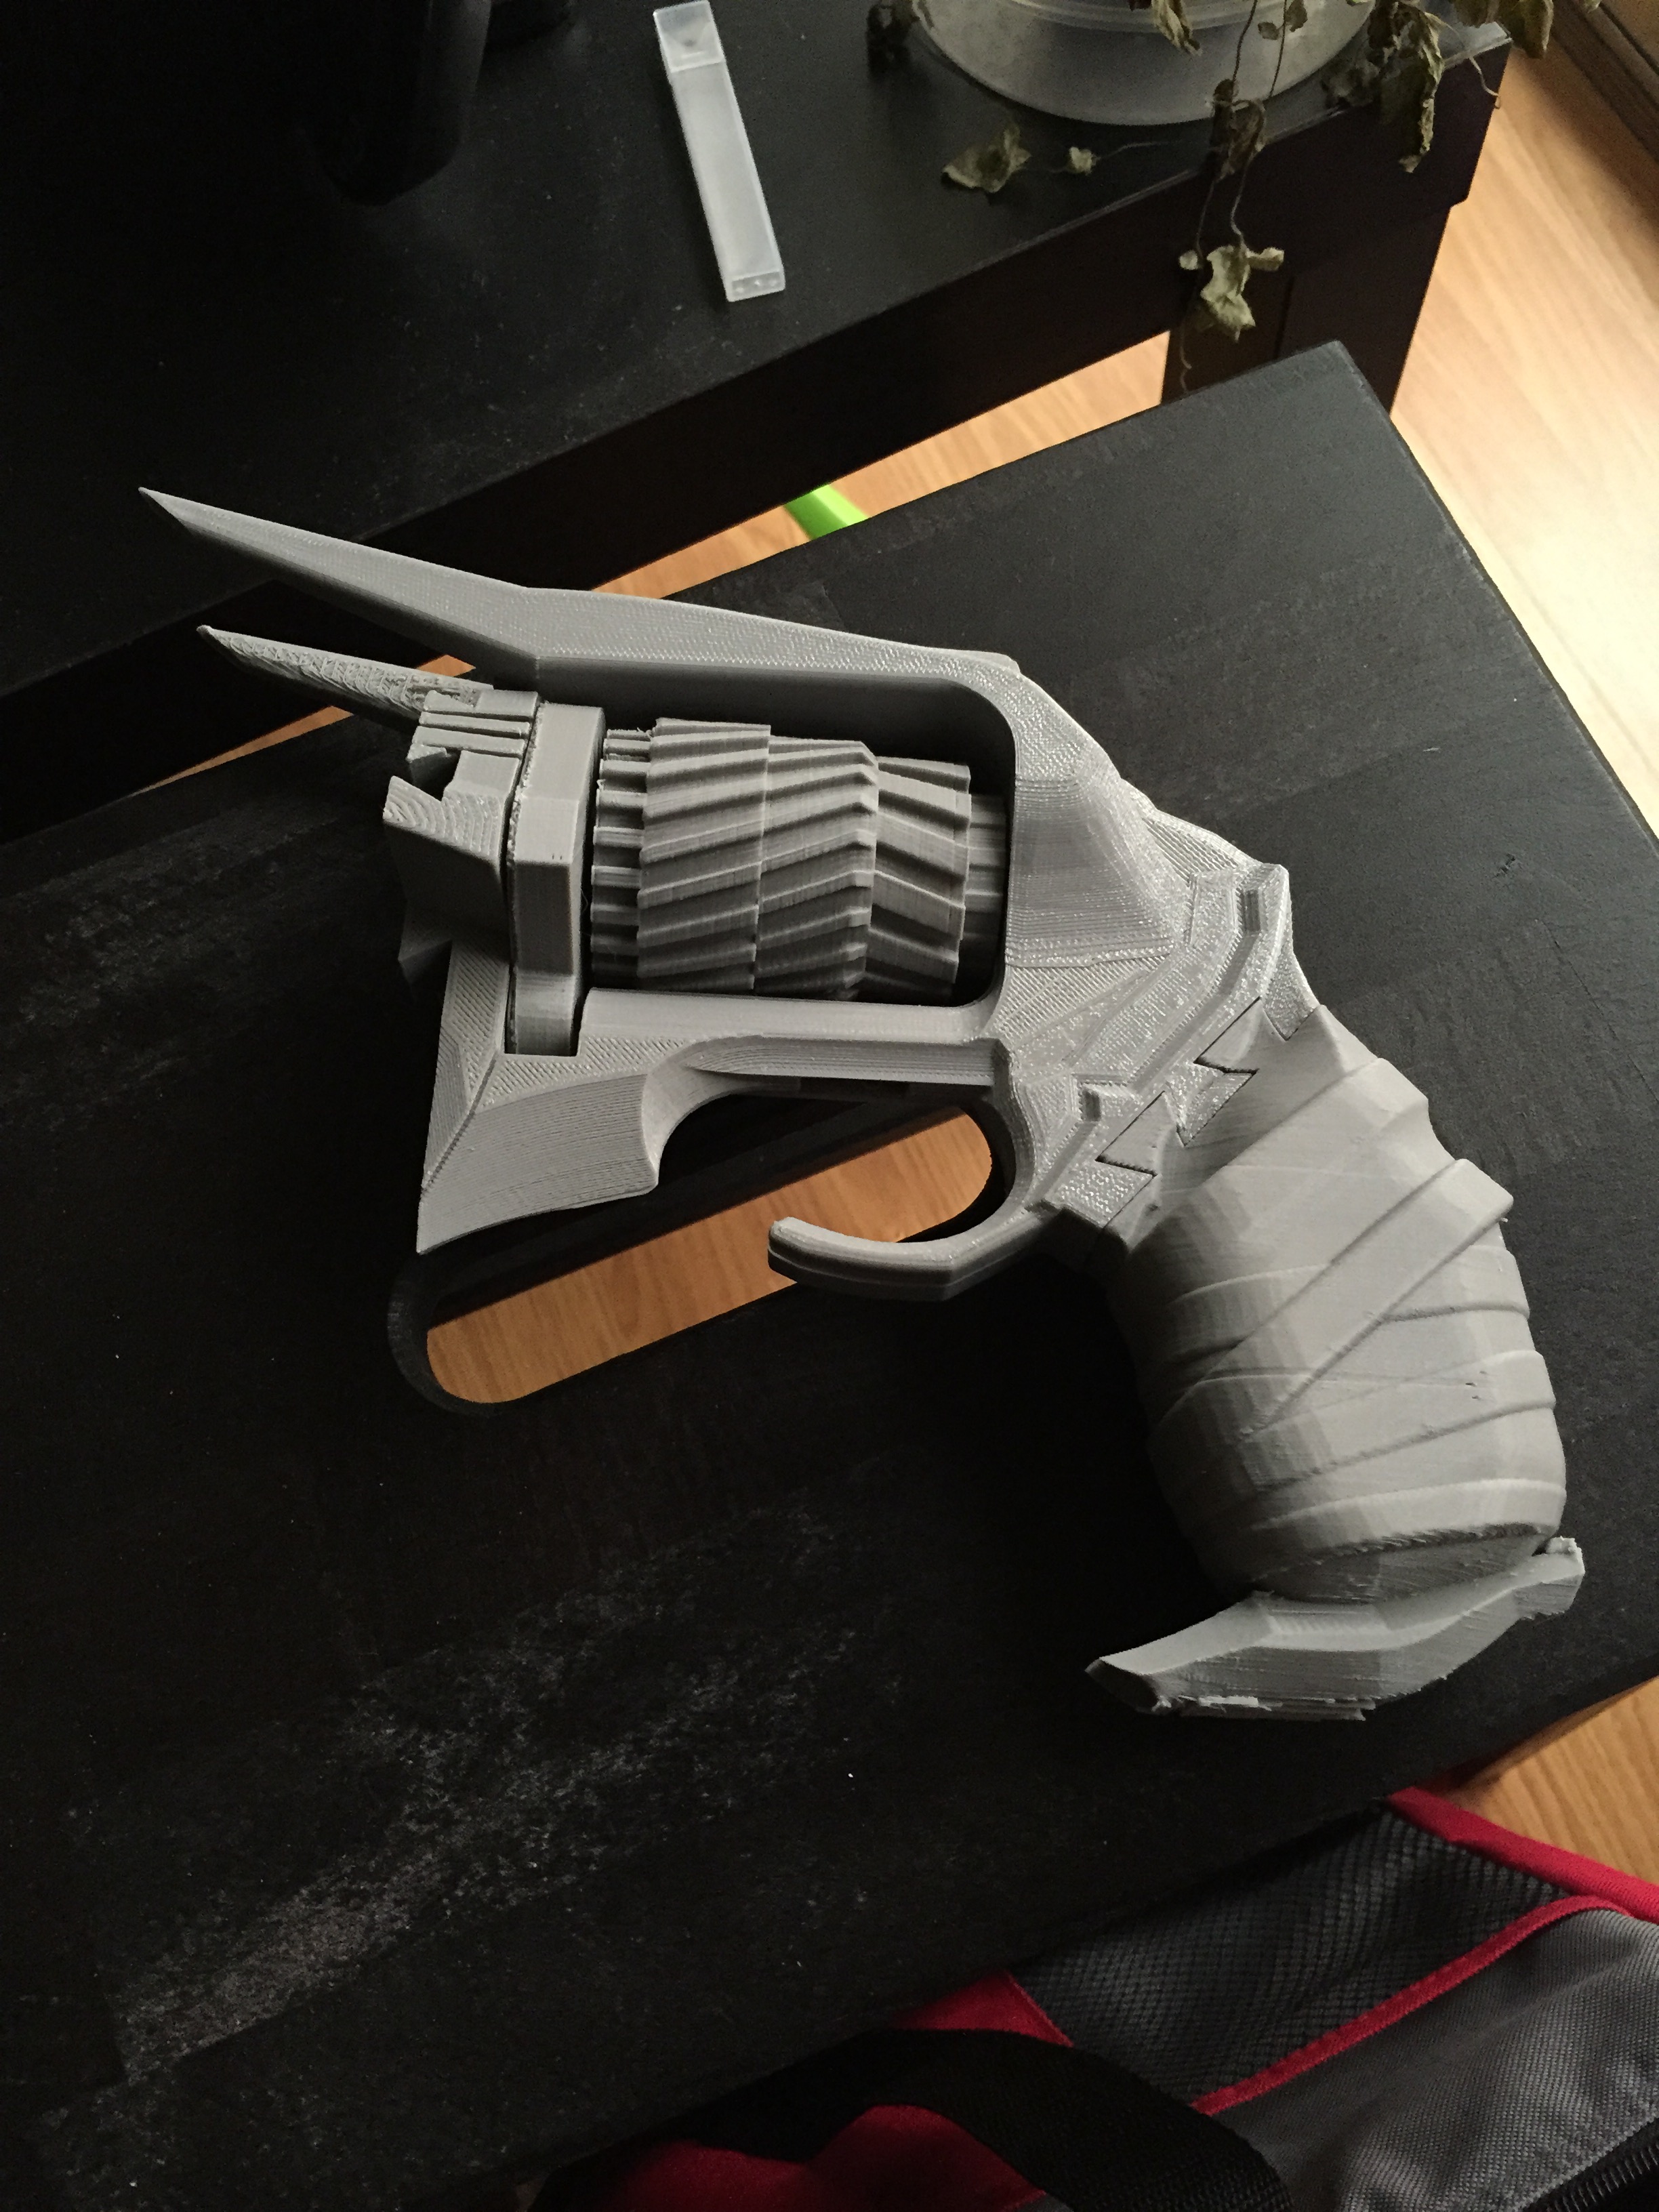
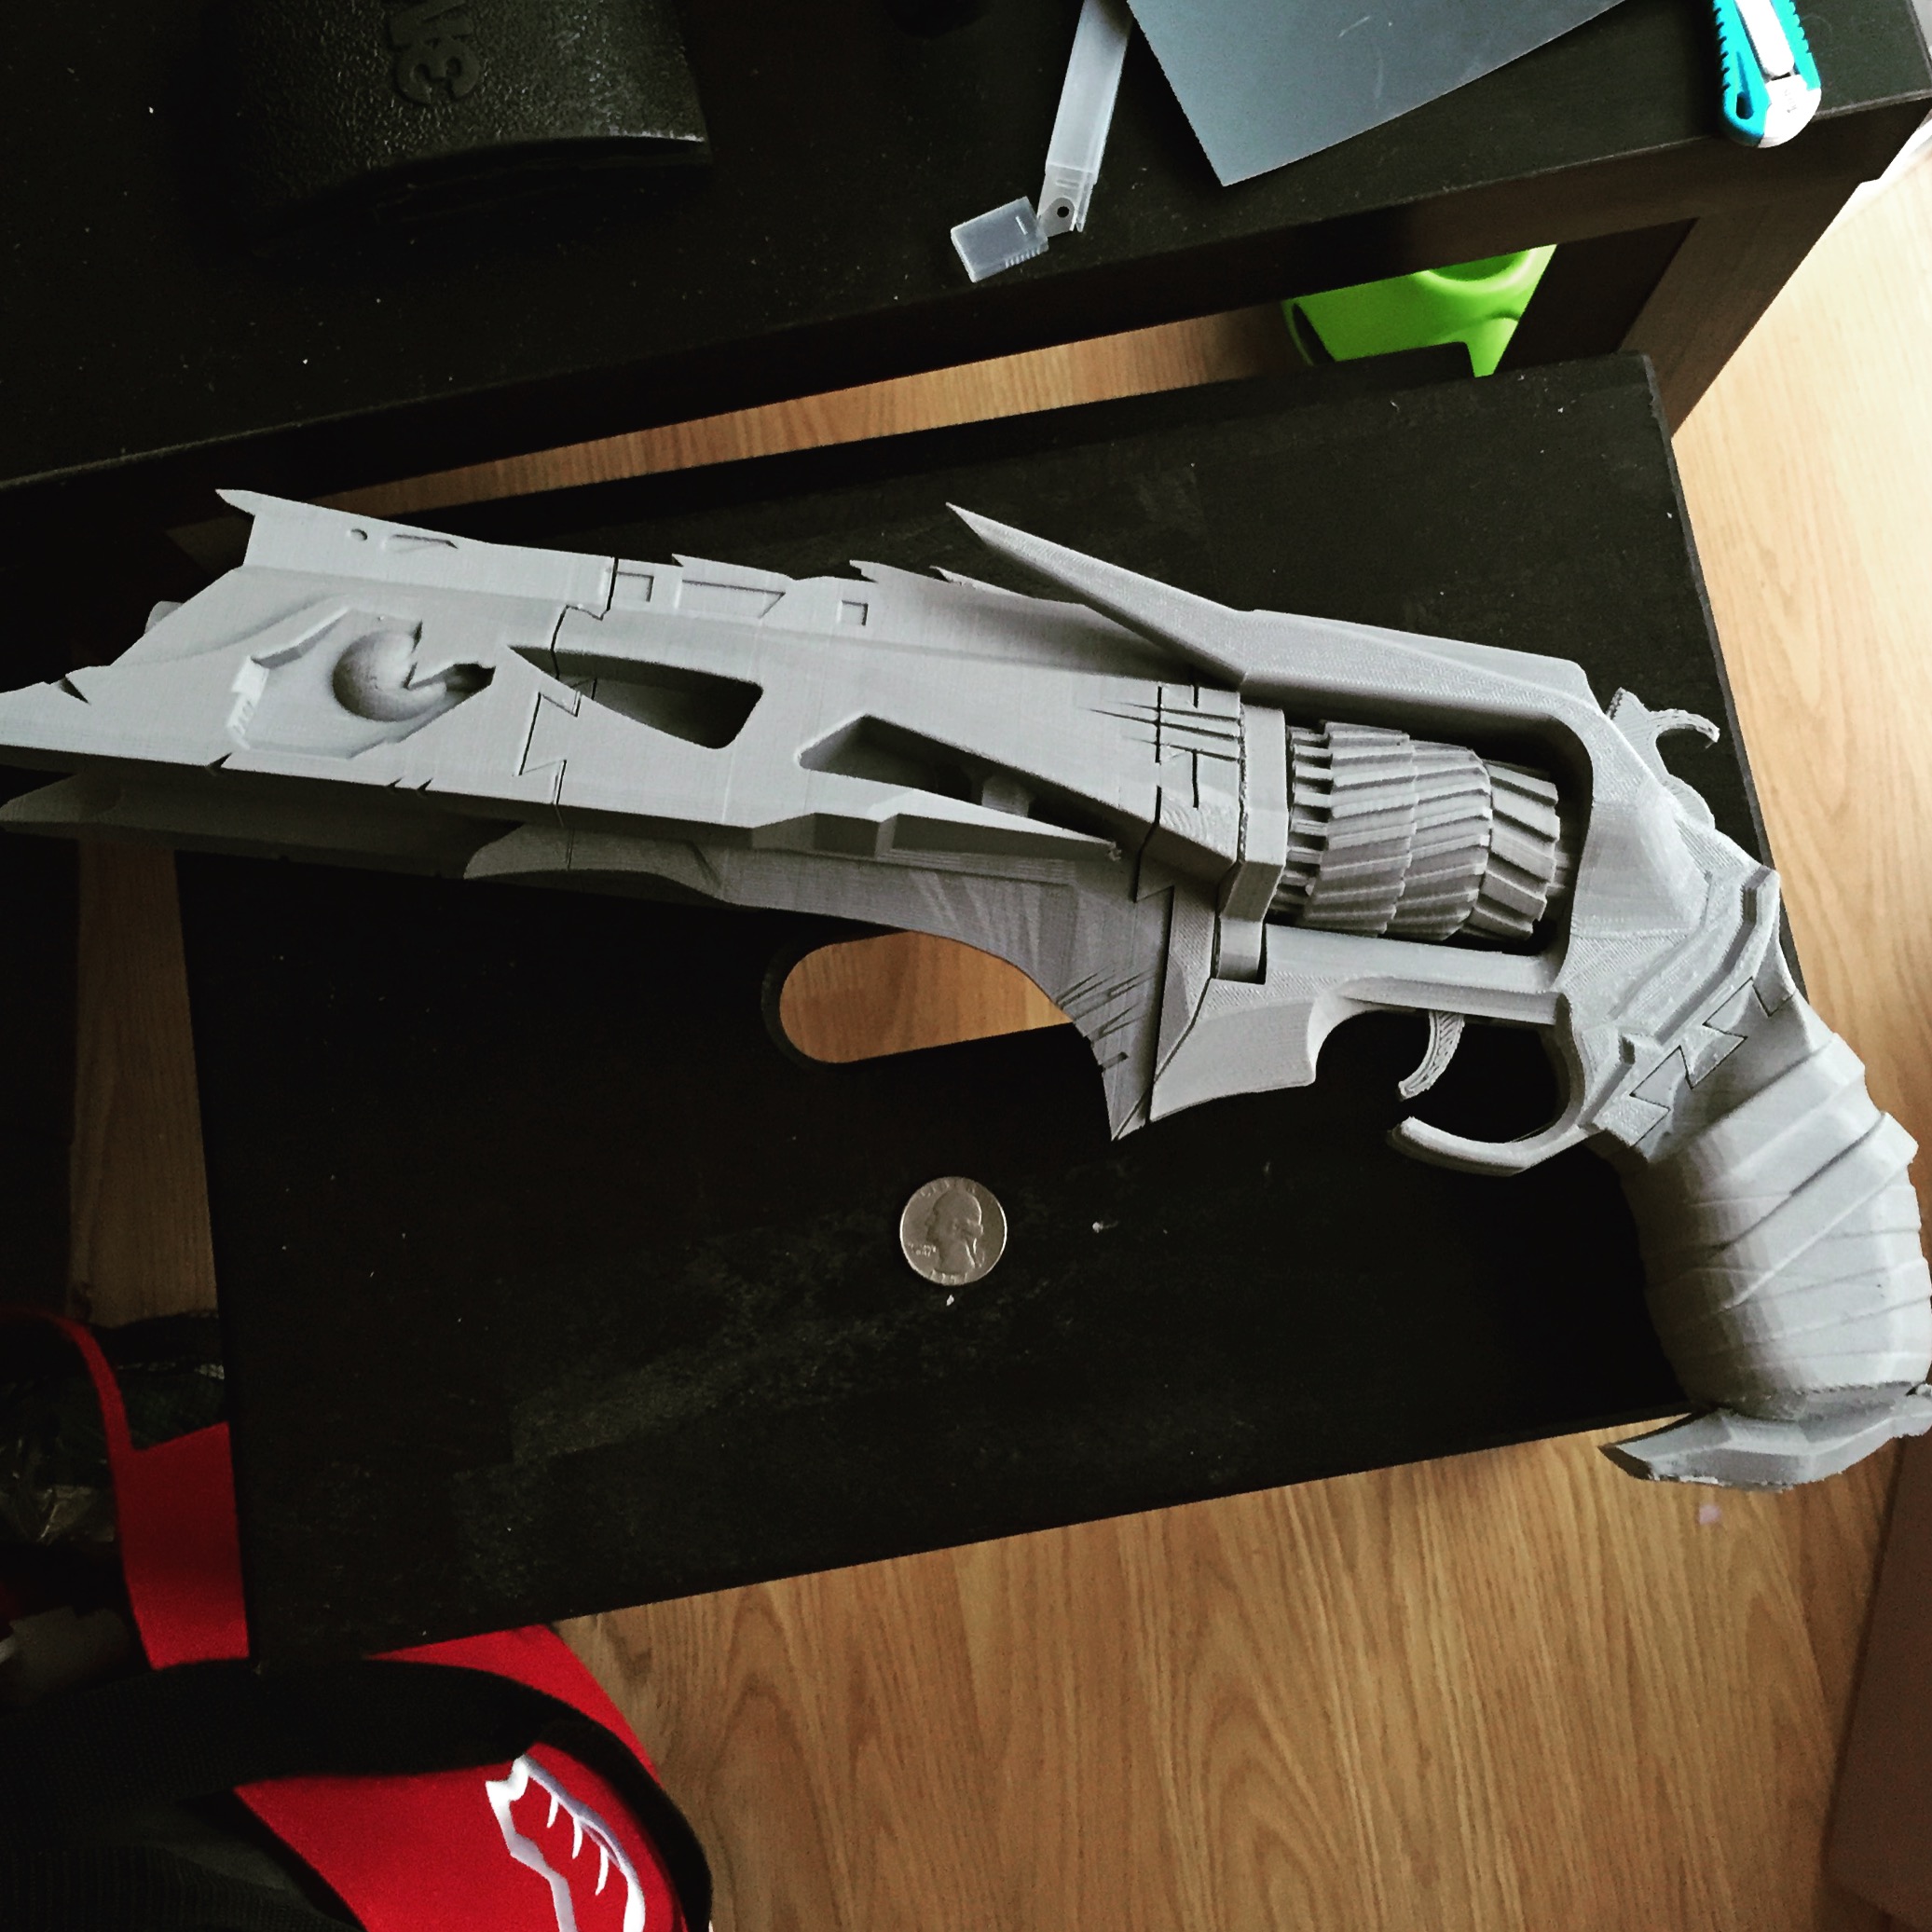 Here’s the whole thing assembled for a test fit. All in all I was happy, and it gave me a good sense of what to expect once the glue was on and I was in a hurry before it dried.
It was a bit too snug in a few places, (don’t want parts breaking under forc when final assembly happens) which made me glad I did the test fit, since I could sand down those dovetails and make it lock in smoother as well.
 Now on to the more messy step: Along with gluing the parts together (no I didn’t use wood glue, LOL. I used an epoxy that works well with PLA) I then wanted to smooth the joins. For that I did a few layers of wood glue because it sands down nicely to take on the primer just right.
You’ll also notice I had already primed the chamber. It’s just resting in place for this photo, once it was primed I planned to hand paint it separately and install it for final assembly.
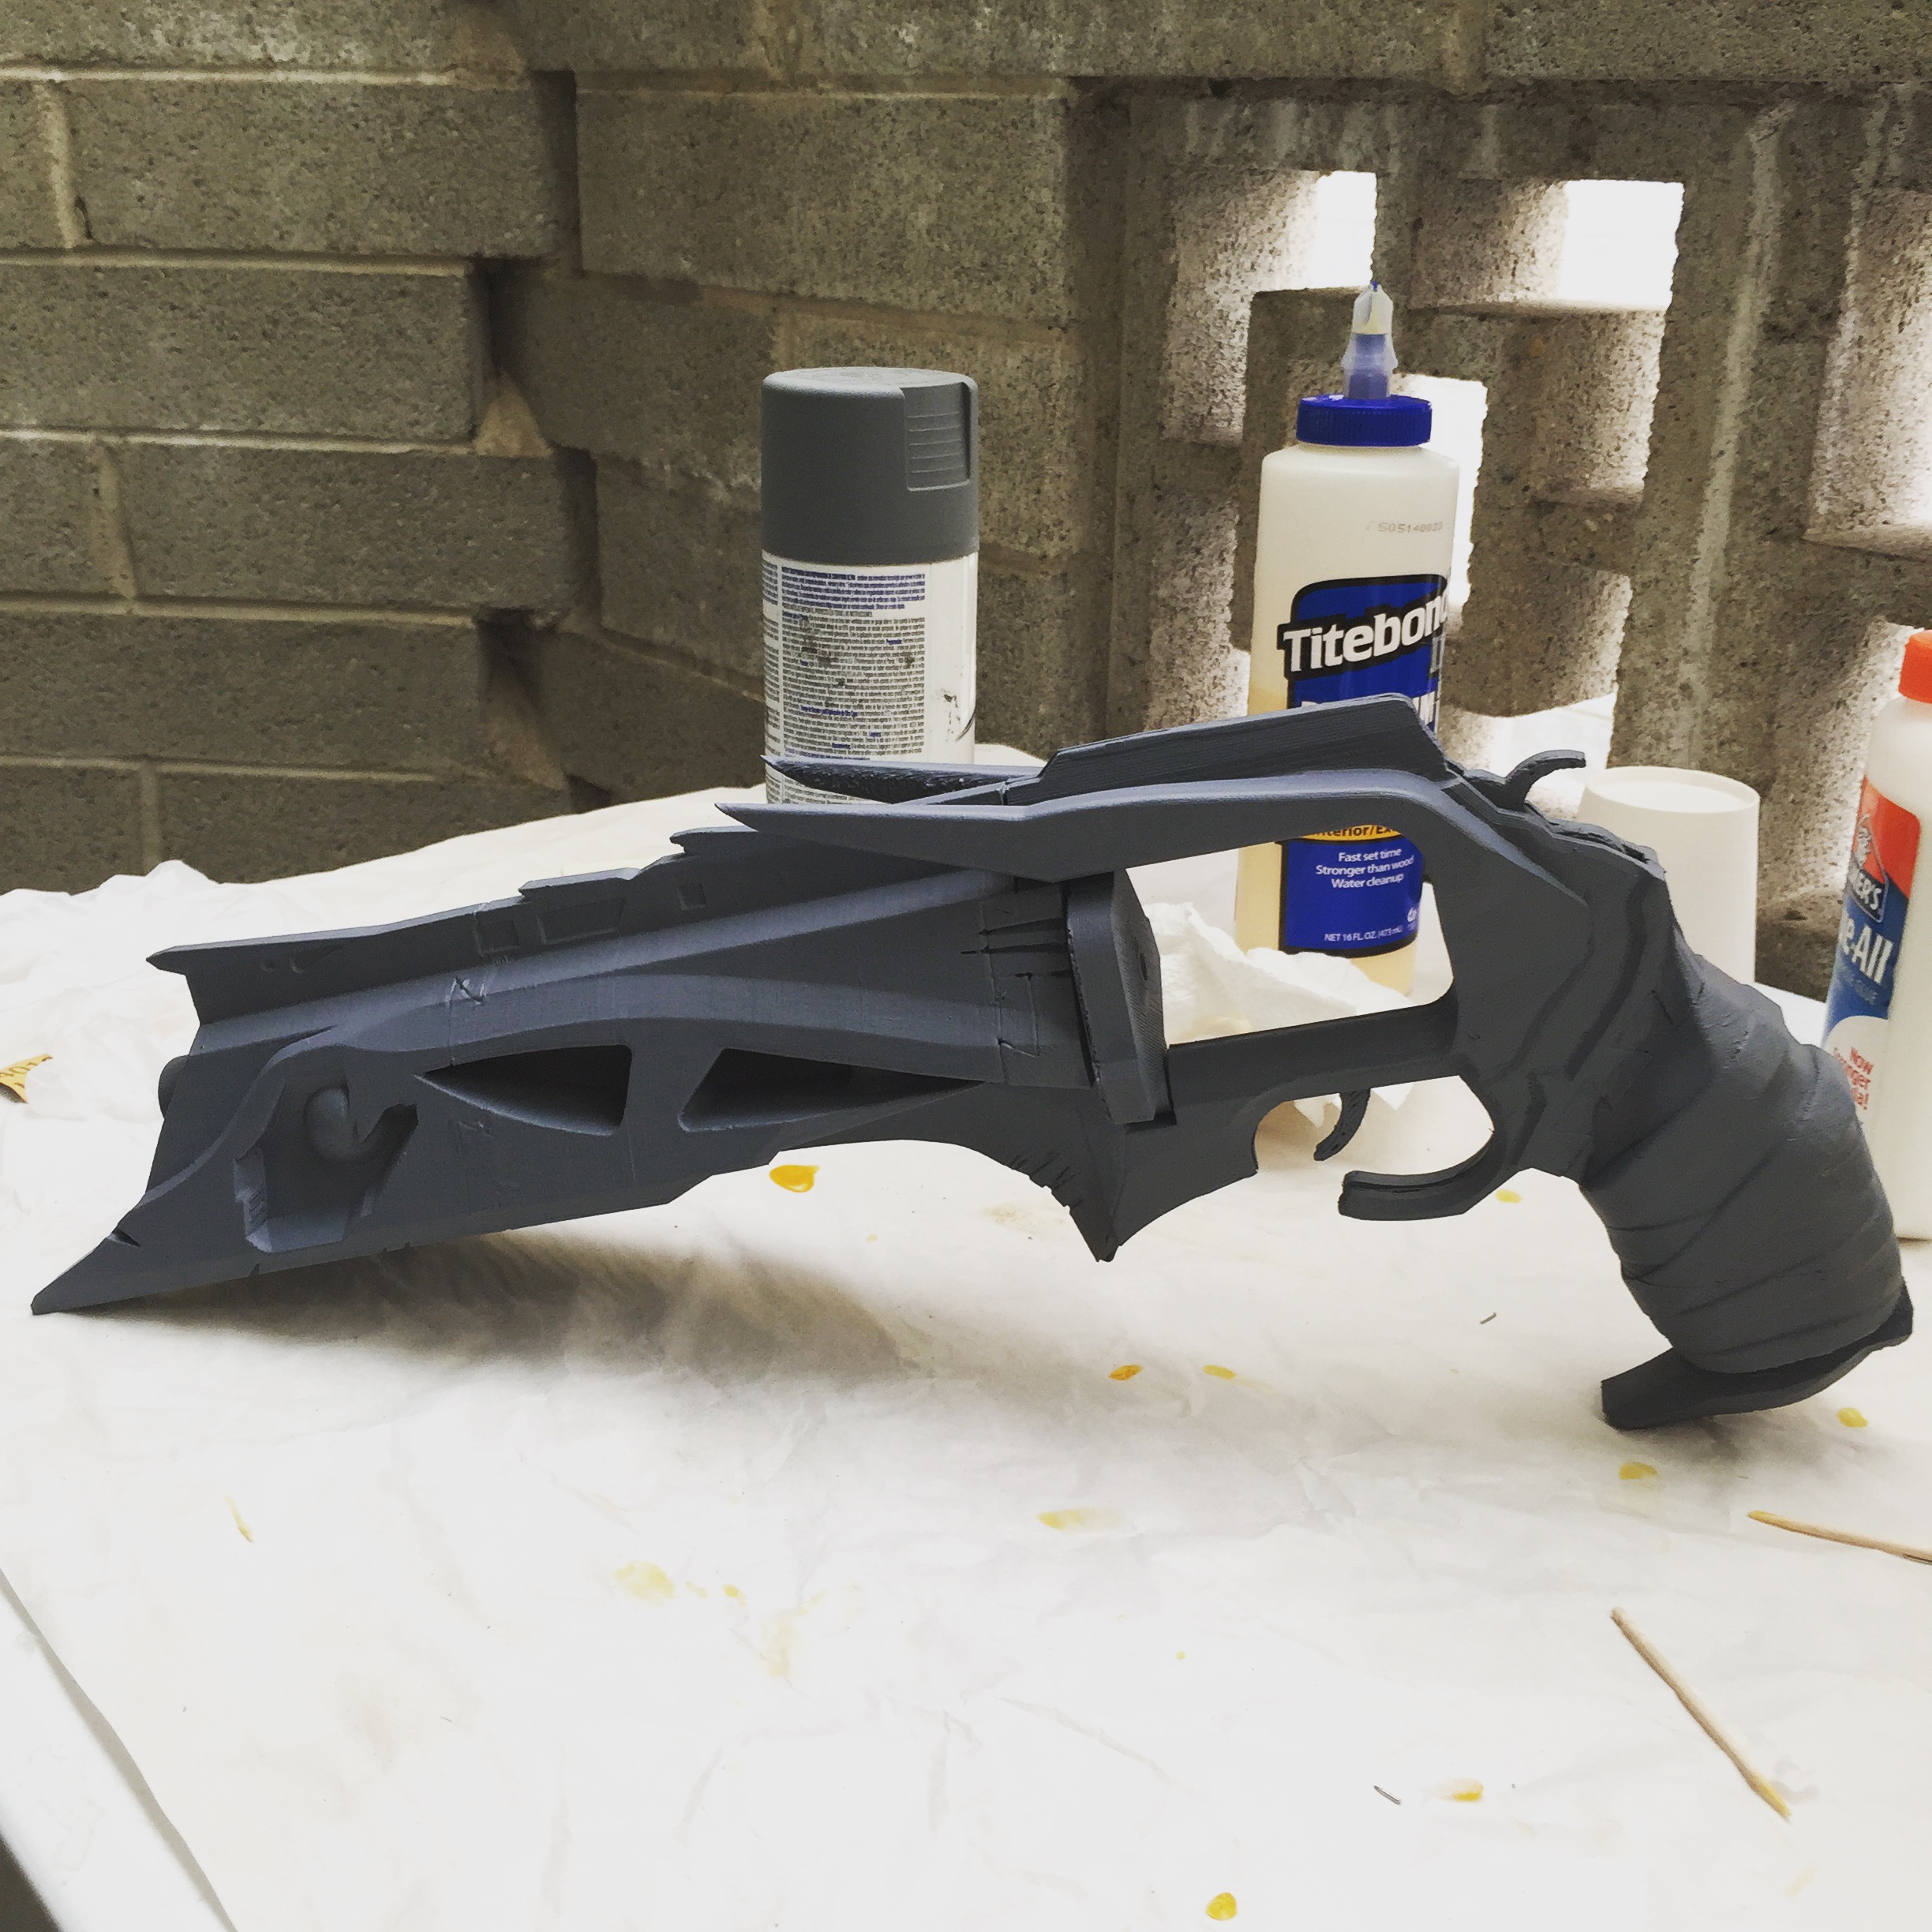 Here we are, with the primer laid down. At this point the only thing left was a final sanding and then the painting. I didn’t take any photos of the paint in-process though, so we’re gonna have to jump right ahead to the money shot!
Unfortunately, around this time that I learned some of the filler compound I had used to fill in some gaps from the joining ended up oozing slowly (we’re talking over several days) deeper into the body, leaving some gaps visible.
And now.. the glamour shot!